• Skip to primary navigation
  • Skip to main content
  • Skip to footer
  • Home
  • Patterns
  • Books
  • About
  • Blog
  • Newsletter
  • Classes

Mary Jane Mucklestone

Hand Knitting Blog & Knitting Patterns

afterthought thumb

Holes! Horrors!!!

January 18, 2012 by Mary Jane 15 Comments

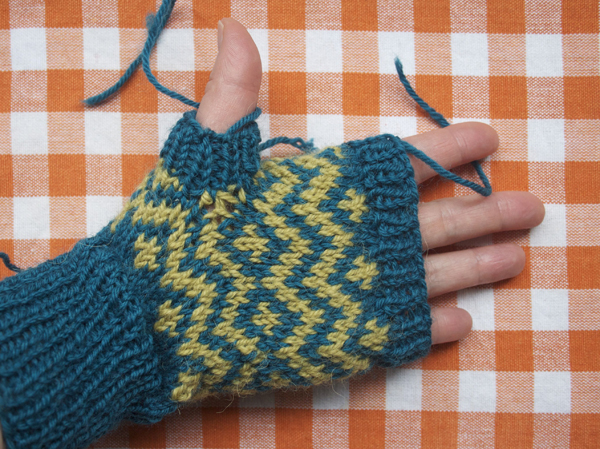
Ah yes you say, “I made your Muckle Mitts and I love them, but I have holes at the corners of the thumb, what did I do wrong?”

Nothing…as Isolda, who has been knitting for over 40 years, since she was a tiny girl in Germany said “There are always holes. We always have holes, even in school we had holes. There are just holes there. We know that.  We sewed them up, we still sew them up”.

And that is usually true…the holes are just…there. And yes, you take the tails of your yarn and sew them up.

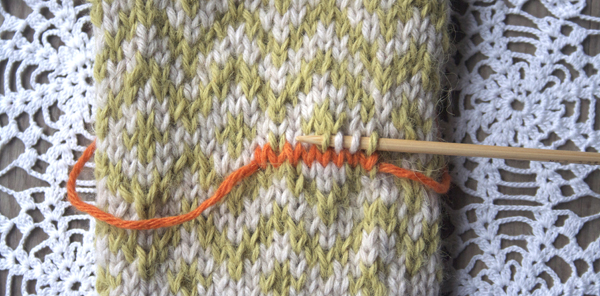
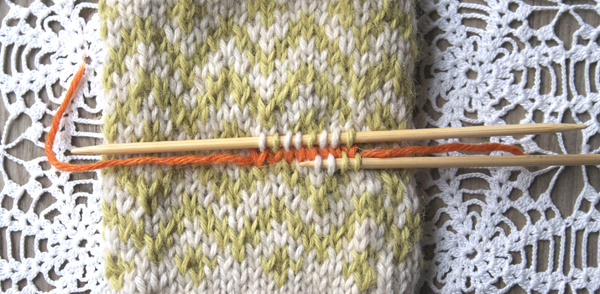
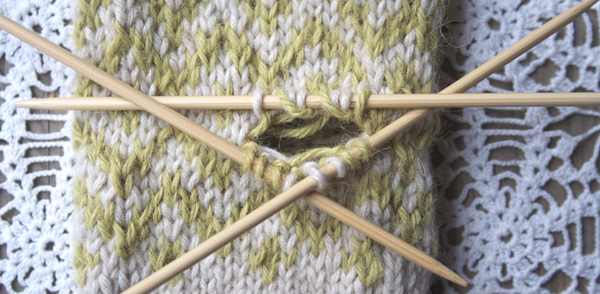
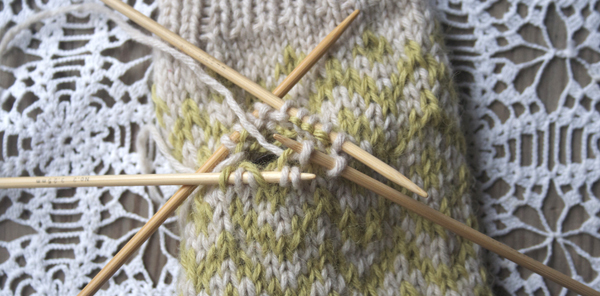
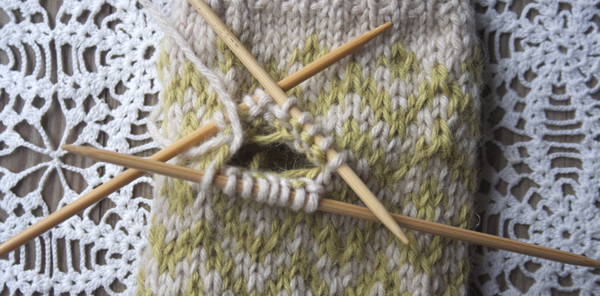
Above First snug up the yarn from the outside, around the hole. You know, follow the stitches along and snug things up with the tip of a tapestry needle.

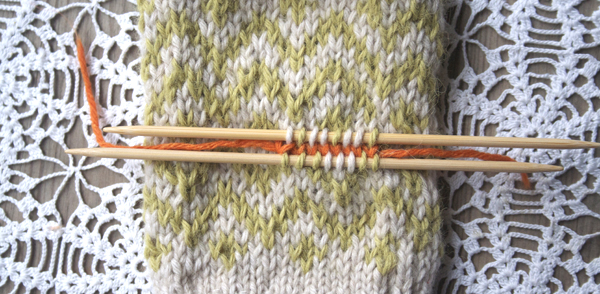
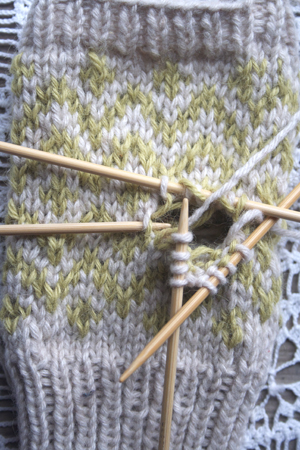
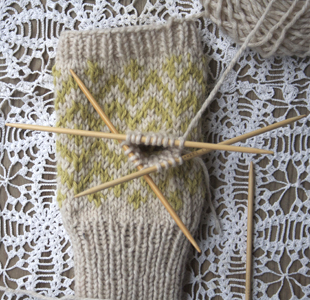
Above Then turn inside out and using the existing ends if they are long enough, begin to sew. These ends are, typically for me,  short. You should try and leave longer tails to give your something to work with. If you can’t work with too tiny tails, use a strand of your Main Color yarn about 8-12 inches long.

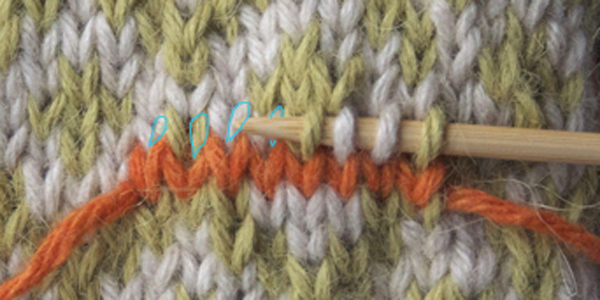
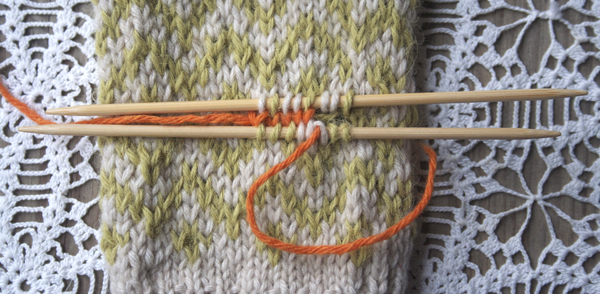
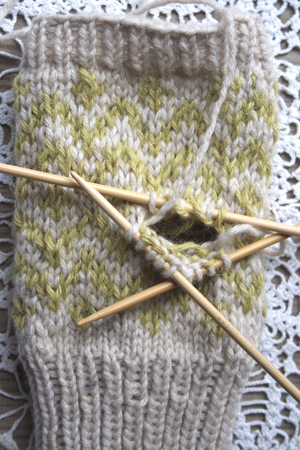
Above Now begin stitching carefully around the hole, taking little stitches skimming through the back side of the stitches. You don’t need to poke through to the front like a quilter would.

Above Take small stitches circling the hole, and gently snug things up.

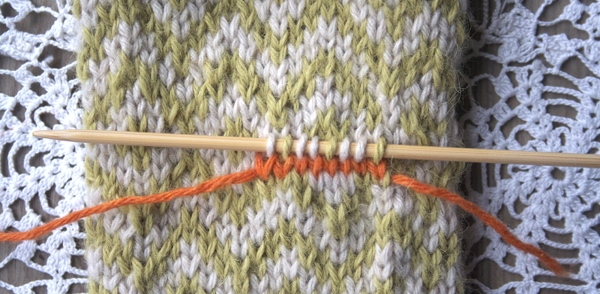
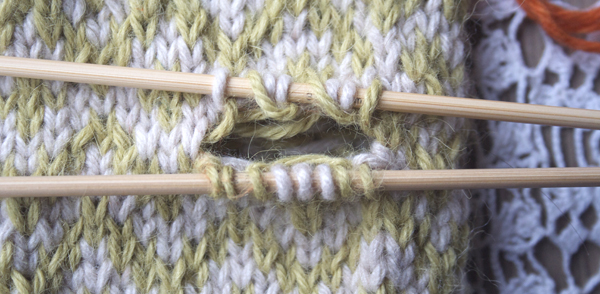
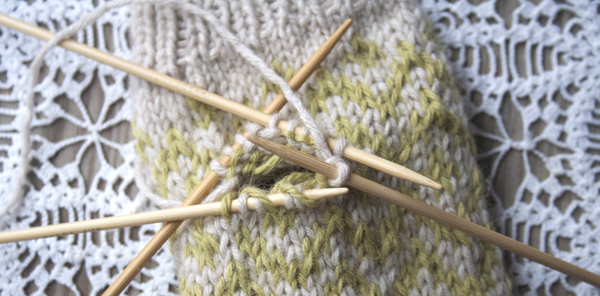
Above Do it with both yarns, then weave in the ends as usual.

Above Like so.

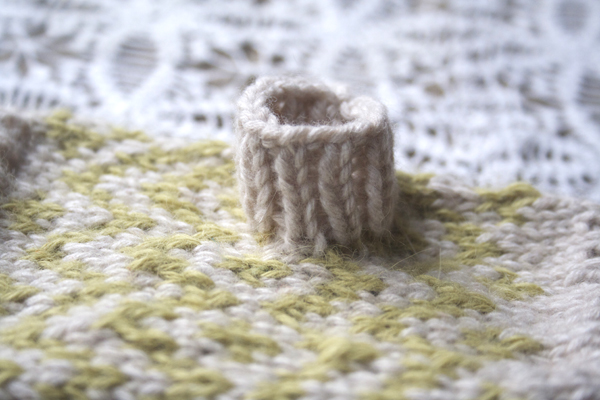
Above Ta Da! No Holes. Now these babies need some serious blocking. Look at that bloated ribbing. Heavens! I’ll wash them lukewarm water with a mild soap, rinse in water of the same temperature,  gently press the moisture  out, shape my mitts into right and left hand, then dry flat.

Tutorials in the Afterthought Thumb Series:

Waste Yarn, What Yarn?

All Thumbs

Filed Under: Knitting Tagged With: afterthought thumb, mittens

All Thumbs

January 16, 2012 by Mary Jane 24 Comments

Ah the beautiful Afterthought Thumb on my Muckle Mitts! Technically this isn’t an afterthought, since we did think about it by knitting waste yarn into the spot where we’ll make the thumb later, See my  last post “Waste Yarn, What Yarn?”. When I learned this thumb, I found picking up the stitches around the waste yarn confusing.

So let’s go through it step by step.

[Above] Here we see the 8 stitches of waste yarn knit in between Rnd 11 and Rnd 12 of the chart.

Using one of  my smaller needles I’ve picked up four stitches  above the waste yarn, picking up the Right Hand leg of each  stitch. Picking up the Right Hand leg of the stitch will mount the stitch correctly on the needle, handy when we get around to knitting it.

[Above] Here’s a close up, see the outlines of the Right Hand leg of the stitch…now of course the point of the needle is obscuring the next stitch that we need to pick up…the difficult thing about still photos..but the turquoise outlines indicate the Right Hand leg of the stitches we will pick up.

Note: It is not the end of the world if you don’t get the correct leg of the stitch, you’ll be able to compensate when you knit it later. The worst thing that can happen is that the stitch will be twisted, which won’t really matter in the great scheme of life.

[Above] Now  I’ve got all 8 stitches positioned on the needle.

Picking up stitches below waste yarn on afterthought thumb

[Above] I’ll leave that needle in place and pick up 8 stitches from below the waste yarn. Again, I’m picking up the Right Hand leg of each stitch, so they will all be positioned correctly for knitting. I’ve got 3 stitches on the needle and I’m just picking up the 4th stitch with the tip of the needle.

Afterthought Thumb with all stitches picked up

[Above] Ok – 8 stitches each on both needles. Next we”ll remove the waste yarn

Afterthought thumb removing waste yarn

[Above] To remove the waste yarn un-pick the orange stitches….sort of slide the orange yarn out. I use another needle to kind of yank it gently out. Like chimpanzees use a stick to get ants from an anthill…a little like that anyway

Afterthought thumb with waste yarn removed

[Above] Here we go, the waste yarn is all the way out, leaving a gaping hole, but hello, all the stitches are safe and secure…even those wonky looking chartreuse ones. As frightening as they look they are fine, we’ll deal with them later.

stitches on needle with waste yarn removed closeup

[Above] Here are those scary stitches up close. The reason the chartreuse ones look so weird, is because the yarn we see at this point is both the stitch and the float. Don’t think about it too much or your head will ache, just trust me – when we knit them everything will be perfect.

[Above] Now we need to put the lower stitches on two needles so we can begin knitting. We’ll name our needles: Needle #1 Lower Right, Needle #2 Lower Left, Needle #3 Up Top. Time to knit!

[Above Left] Using my Main Color yarn, in this case Natural White, I’ve knit across Needle #1 and just finished knitting across Needle #2.

Needle #2 is in such a crazy perpendicular arrangement to facilitate the next step…

At the corner here, between Needle #2 and Needle #3  we’ll pick up a stitch. Insert the tip of your working needle under a stitch or two of the body of the mitt, in the corner between Needle #2 and Needle #3 – knit a stitch onto Needle #2. Sometimes I find it easier to use a spare needle  as shown, to knit this “picked up stitch, and then place the stitch back on needle #2.

[Above Right] We now have 5 stitches on Needle #2.

Afterthought thumb picking knitting first round

[Above] Time to knit Needle #3. We’ve turned the work,  Needle #3 is on the bottom of the picture now. I’ve knit the first stitch..but…Horrors! The next stitch to knit looks so messy!

picking up wonky looking stitches on afterthought thumb

[Above] Not to fear,  just knit that wonky Contrast Color stitch. See the new stitch on the Right Hand Needle? It’s fine and dandy.

[Above] I’ve knit all the way across Needle #3. See? Not wonky. Pretty pretty!

[Above] Now, pick up the corner stitch between Needle#3 and Needle #1,  just like you did before. If you’re using an auxiliary needle, make sure the stitch goes back onto needle #3.

We have 4 stitches on Needle #1, 5 stitches on Needle #2 and 9 stitches on Needle #3 for a total of 18 stitches.

afterthought thumb first round completed

[Above] Okey Dokey! I’ve knit all the way around the thumb opening once. We’re looking at our thumb right side up again, with Needle #3 at the top.

  • Beginning ribbing of afterthought thumb
  • afterthought thumb finished

[ Above Left] Now it is time to begin ribbing. We’ll work a K1 P1 rib for 5 rounds and then cast off in the rib pattern.

[ Above Right] Done – Ta da!

That wasn’t so hard now was it? Just knit it is my suggestion, don’t think about it too much before hand and you’ll be fine. Too much thinking and worrying is paralyzing and damn it – your hands are getting cold!

Muckle Mitts

Want a tutorial for eliminating holes in the corners of your afterthought thumb? Read:

Holes! Horrors!!!

Filed Under: Knitting Tagged With: afterthought thumb, knitting, technique

Before Footer

Footer

  • Facebook
  • Instagram
  • Pinterest
  • Twitter
  • YouTube

Mary Jane Mucklestone © 2020